The Mercury Midge is perhaps the simplest fly you will ever tie. (Well... most midge patterns are pretty darn simple to tie and only require less than a handful of materials.) And eventually you figure out the midge patterns that are the easiest to tie are generally the most effective, too!
I will be tying a variation of the original; which, appears be the most popular way of tying the pattern these days. The original, still popular in the South Platte area, had a small thorax of dubbing the same color as the body. The name may also appear as Mercury Black Beauty.
Mercury Midge
Materials:
Hook: Choice (Sizes 14-22) (Pictured is Daiichi 1150 size 18) Original was tied on a straight shank hook.
Bead: 15/0 Japanese Tohu transparent glass with silver lining (appearance is similar to mercury in a thermometer- hence the name Mercury Midge)
Thread: UTC 70 color of choice. Black, olive, red, cream, and brown are best.
Rib: Extra Small silver (Pictured is Hends .009)
Optional coating of Sally Hansen's or UV resin (Deer Creek Diamond Fine)
Step 1:
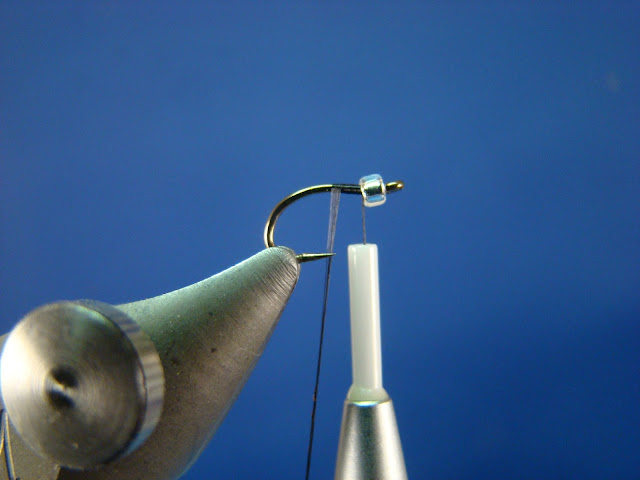
Flatten barb with vise jaws and add 15/0 bead.
Step 1:
Flatten barb with vise jaws and add 15/0 bead.
Step 2:
To build a smooth taper to the body of the fly start thread at the middle of the hook shank. Instead of crossing the thread initially, wind thread forward to the bead. Keep the thread as flat as possible.
To build a smooth taper to the body of the fly start thread at the middle of the hook shank. Instead of crossing the thread initially, wind thread forward to the bead. Keep the thread as flat as possible.
Step 2A:
Wind thread back over initial wraps and proceed to approximately the three quarter mark on the shank. Remove tag end.
Step 2B:
Return thread to the bead. Remember to keep the thread flat.
Step 3:
Next, let's secure our ribbing without taking one turn of thread. Simply bring ribbing material under the hook slightly touching the thread and move up and away from you. Both hands should be on the far side of the vice. Lift ribbing straight up. You should see the ribbing underneath the last turn of thread on the hook shank. Repeat once or twice (essentially two or three wraps of thread) and pull down on thread firmly. Ensure wire is parallel with hook.
Step 4:
Wind thread to rear well into the bend of the hook and return to the bead. Ensure ribbing is tied in parallel to the shank as you progress. Remove waste end of ribbing at the bead. Do not use scissors. This can be accomplished by bringing the tip of the bobbin up the bead firmly and then wiggling the wire. It will break cleanly.
Step 5:
The first turn or two of ribbing should always behind a thread or floss body. This keeps the body material from unraveling or moving down the hook.
(Pictured below) The first two turns of tinsel are touching. The next two are fairly close to one another before opening the distance- just like the natural chronomidae. Complete seven or eight turns to the bead and secure with two or three wraps. Remove tag end as described in step 4. Note smooth transitional taper of the body.
Step 6:
Make two 3 or 4 turn whip finishes. The fly is complete and you can easily expect to catch fish as tied. However, should you choose not to coat the fly with Sally Hansen's or UV resin I would recommend making the forward portion of the taper a little thicker. I feel this keeps the bead's brilliancy from overpowering the fly.
Step 7 (Optional):
Years ago many tiers completed thread or floss bodies/tags with a drop or two head cement or varnish. This ensured longevity of their "working" salmon or steelhead flies. Eventually the idea was brought to soft hackles and midges with thread bodies. This practice continues today among the old timers. Nowadays, many tiers are enjoying the practice of "bombproofing" their midge bodies with ultra violet (UV) resins. These resins certain save a tremendous amount of time and create different effects depending on the material in use.
The below fly was finished with two thin coats of Deer Creek Diamond Fine UV resin from the fly pictured in step 6. Not only was I able to keep a smooth and thin taper appearance within record time over Sally Hansen's, but the additional coat also allowed for a thin layer of transparency which I feel makes the fly that much effective with light refraction. Look closely underneath the fly! Also notice I applied a little resin to the rear of the fly over the silver ribbing (butt). This not only protects the wire butt section, but also aided with a slight taper.

As a kind reminder... Change up those body colors up with the bead and ribbing remaining the same!
Enjoy!


No comments:
Post a Comment