
The blog will showcase quite a few different midge patterns over the course of the next few weeks. Exciting, eh? I know these small patterns don't appeal to many among the masses, but the reasons to exhibit them are numerous. However, my main motivation is two-fold. First, midges are an important staple to trout throughout the year in moving or still waters. More so during the colder months. Frankly, it would fatuous not to have at least a small selection of midge patterns available at any given time. Secondly, it gives me an opportunity to display different materials not commonly seen in fly shops, pattern books or the internet. Utilizing different materials is fun and exciting. But it truly opens the gateway to theory, thought and creativity when we sit down at the vise.
This time I'll utilize Ice Dubbing for the wing. There are a couple different ways to tie in this curly/crinkly material in for winging material, and perhaps you'll immediately think of Mercer's Trigger Nymph, but I'll stick to the easiest technique first. I'll also be adding the microfibers from Glitter Thread for the shuck. These microfibers are very similar to Z-lon, but thinner in diameter making it an ideal shuck or wing material for small or micro patterns.
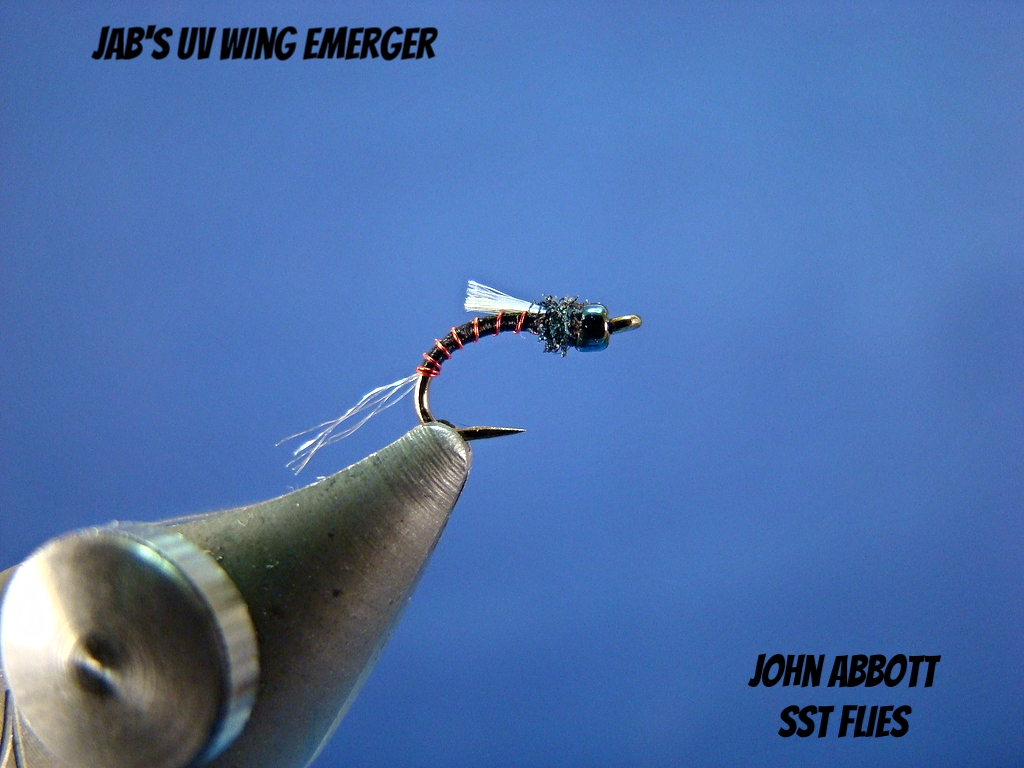
Materials
Hook: Daiichi 1150 (size 18 pictured) or any curved scud hook (sizes 16-22)
Bead: 15/0 Japanese Tohu glass bead - Gunmetal
Thread: 14/0 Veevus (Black pictured) or similar thin denier thread. Brown, tan, cream, light or dark olive are excellent back-up colors.
Ribbing: Hends .09mm Red wire or similar equivalent.
Shuck: Microfibers from white Glitter Thread
Thorax: Sybai Fine Flash, Black (very dark peacock coloration)
Step 1:
Flatten barb with vise jaws Add bead to hook and secure in vice. Start thread immediately behind bead and make 5 or 6 rearward wraps.

Step 2:
Remove 3 or 4 inches of ribbing from the spool. To secure ribbing without taking one turn of thread simply take the wire underneath the hook and grab the tag end (left) from behind the hook and lift straight up with both hands from slightly behind the hook. Repeat this step two more times in a counter-clockwise (or front to back) rotation around the hook shank. You should essentially have three wraps of thread securing the wire. Apply a slight amount of pressure to the threads wraps pulling on bobbin. Ensure ribbing is parallel to hook shank.

Step 3:
Cut 2 or 3 inches of Glitter Thread from spool. To separate the fibers apply medium pressure to thread with a pinch between index and thumb. Draw from the middle of thread outward. Remove pearl mylar core. You should have five transparent microfibers in hand. Secure microfibers to the top of the shank utilizing the method in step 2. This time take one full movement around the shank followed by one turn of thread.

Step 4:
Ensure thread remains flat throughout this step.
Make even wraps of thread rearward into the bend of the hook as pictured and return to the bead. Because we are securing materials to a bare shank make sure ribbing stays parallel to the body and the shuck remains directly on top of the hook.

Step 5:
Wind ribbing forward. Ensure shuck microfibers remain directly on top of the hook shank. You will have to adjust the microfibers with the opposite hand during the first turn or two of ribbing. The first two turns of ribbing are touching with the first turn immediately behind the thread. Take an additional 7 or 8 wraps of ribbing while slightly opening the distance between turns. Secure with flat thread wraps. Cutting the shuck to length can be done now or after the fly is finished. I prefer to wait and remove the fly from the vise. This aids is determining proper length and keeps my scissor points away from the vise.

Step 6:
Remove just little UV Ice Dubbing fibers from package. I try to retrieve a total of 15 to 20 fibers in equal parts of both the gray and UV mylar. Lightly rolling the fibers between the index finger and thumb will help control the material as well as heavily moistening or wetting the fibers with water. Tie in Ice Dubbing directly to the top of the shank. Note the thread is to the rear of the thorax area.

Step 6A:
Draw forward fibers rearward back over the body at the same time as applying pressure to the thread wraps. Secure with forward thread wraps. Thread should finish directly behind the bead as shown.

Step 7:
Dub a small thorax of Fine Flash. Whip finish.

Step 8:
Trim wing to length. Just past a half body length is perfect! Remove hook and trim shuck to one body length.

No comments:
Post a Comment