

Somewhat disconcerting is the amount of patterns floating all over the internet claiming to be Sawyer's Pheasant Tail Nymph. While I can certainly understand some of the interpretations of recipe and spirit of intent, but to not follow the tying instructions the way intended has only blurred such a historic pattern to today's endless variations.
Having owned Sawyer's Nymphs and the Trout before trading the book for a few ounces of seal fur and tying dozens upon dozens of his Pheasant Tail Nymphs commercially, I can positively say the below instructions are true to the original except for the reddish brown copper relay coil wire, odd sized old English hooks, and the center tail of a cock European pheasant.
I encourage you to do a little research about the man and his patterns. Well worth the time. This fly is pure genius!
Materials
Hook: Standard nymph size 14 through 18
Thread: Fine, dark copper wire
Body: Natural, cock pheasant center tail.
Body: Natural, cock pheasant center tail.
Step 1:
Pinch barb with vise. Secure hook in the jaws.

Step 2:
Starting slightly behind the eye, wrap copper wire to build a hump at the thorax section, and continue winding back to the spot even with the barb. No need to worry about aesthetics..

Step 3:
Select four to six pheasant tail fibers from the center tail and secure to the top of the shank with two turns of copper. I've seen various lengths on his flies, but Sawyer suggests "about 1/8th inch for a size 16 hook." This equates to roughly 1/4 body length for other size hooks. Rather short.

Select four to six pheasant tail fibers from the center tail and secure to the top of the shank with two turns of copper. I've seen various lengths on his flies, but Sawyer suggests "about 1/8th inch for a size 16 hook." This equates to roughly 1/4 body length for other size hooks. Rather short.

Take a few turns of pheasant tail fibers around the copper. Now wind copper and pheasant together to the eye. Secure pheasant to the top of the eye. It is perfectly acceptable to have the copper in the thorax to show through. In fact, it might have been encouraged. Sawyer writes a lot about the translucent effect of copper.

Step 4:
Take one (or two) wraps of copper back over the thorax. Grab fibers and draw them to the rear.

Take one (or two) wraps of copper back over the thorax. Grab fibers and draw them to the rear.

Make a wrap or two forward to the eye. Grab fibers bring forward and secure. You may see a few flies finished at this point. More than likely due to the shorter pheasant fibers.


The common finished fly will have the fibers returned rearward again and secure behind the thorax or thorax.
Secure with a two turn whip finish or half hitches. Cut butt ends.
Secure with a two turn whip finish or half hitches. Cut butt ends.

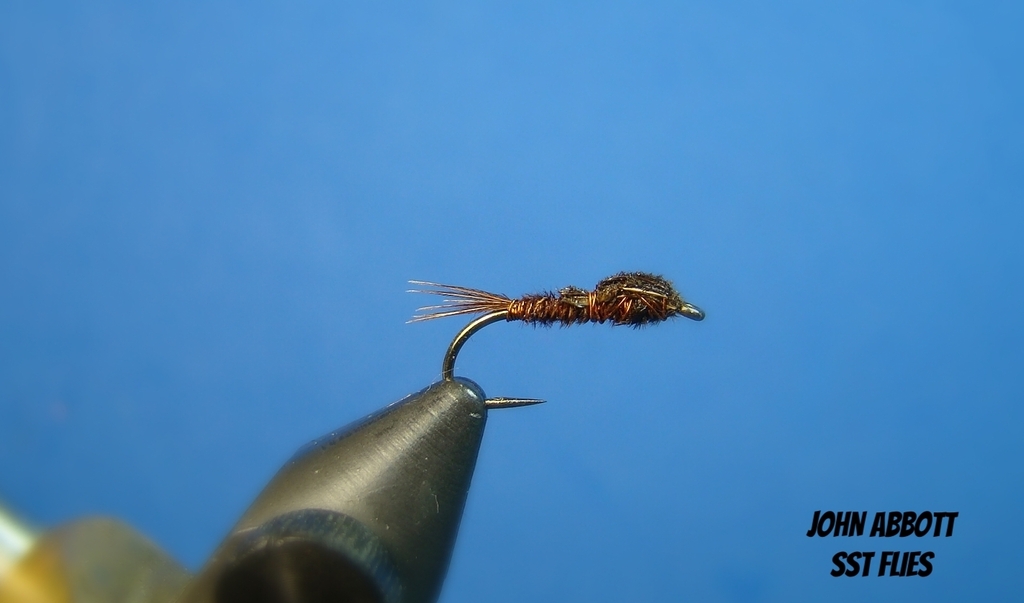
Finished!

Here is the master himself!
Enjoy!
Enjoy!
Excellent! Thanks John!
ReplyDeleteMy pleasure.
ReplyDelete