

Credit Al Troth with his modification of Frank Sawyer's deadly pattern. Troth's version, now known as the American Pheasant Tail Nymph, by and far surpasses Frank Sawyer's pattern in popularity here in the United States. Why? If I had to guess the reason(s) for it's success, aesthetics and the magic of a peacock thorax immediately come to mind. However, you would be crazy not to have both patterns stream side- especially on heavily fished waters where the fish "have seen everything." If Troth's version doesn't work I bet a dollar Sawyer's does!
There are a couple different ways of tying this pattern. E.g., the tail and body are tied separately, wing case and legs are tied in first, or the legs are omitted altogether. The latter is especially true on sizes smaller than 18. Don't forget there are different colors of dyed pheasant tail. Olive, brown, black, and yellow are all effective, too!
Handfuls of variations available to the tier however, I find the "Plain Jane" version the most productive. I usually run it under a indicator type fly or as a dropper off a heavily weighted nymph. Take it to the lake... it can be very effective for imitating the callibaetis.
You have plenty of choices... Have fun!
Materials:
Hook: Daiichi 1530 sizes 12-20
Thread: 8/0 or 10/0 color to match
Tail: Pheasant tails
Ribbing: Copper wire
Thorax: Peacock herl
Wing case: Pheasant tail fibers
Legs: (Optional) If used, the tip of the wing case fibers are tied along the sides.
Step 1:
Pinch barb utilizing vice. Secure hook. Start thread approximately one eye length behind the eye. wrap thread rearward stopping even with the barb.

Step 2:
Select four to six pheasant tail fibers. Draw them 90-degrees from the stem to align the tips. Pluck or cut the fibers close to the stem. The tail is slightly longer the one hook gap. Secure the tail with two wraps of threads.

Step 3:
Tie in copper wire in the same spot and tail. Lift tail butt ends and secure wire along the shank with tight wraps of thread forward.

Step 4:
Careful grab tail fiber butts and start the first wrap towards the rear. This will cover the thread wraps. Then wrap forward stopping at approximately the 70-percent mark on the shank (as pictured) and secure.

Cut butt ends.

Step 5:
Select six or eight tail fibers, align tips, and remove from the stem. If you desire to tie legs for your fly, simply measure the fibers to equal one hook length (eye to bend) and secure them at the stopping point noted in step 4.

Step 6:
Tie in peacock herl. One herl taken from below the eye is all that is needed however, two herls maybe be used if utilizing "strung herl." The herl from below the eye is incredibly strong and provides fuller and more vibrant fibers. Wrap forward without crowding eye. Stopping point is the original thread starting point in step 1.

Step 7:
Pull tail fibers over the thorax and secure with two wraps.
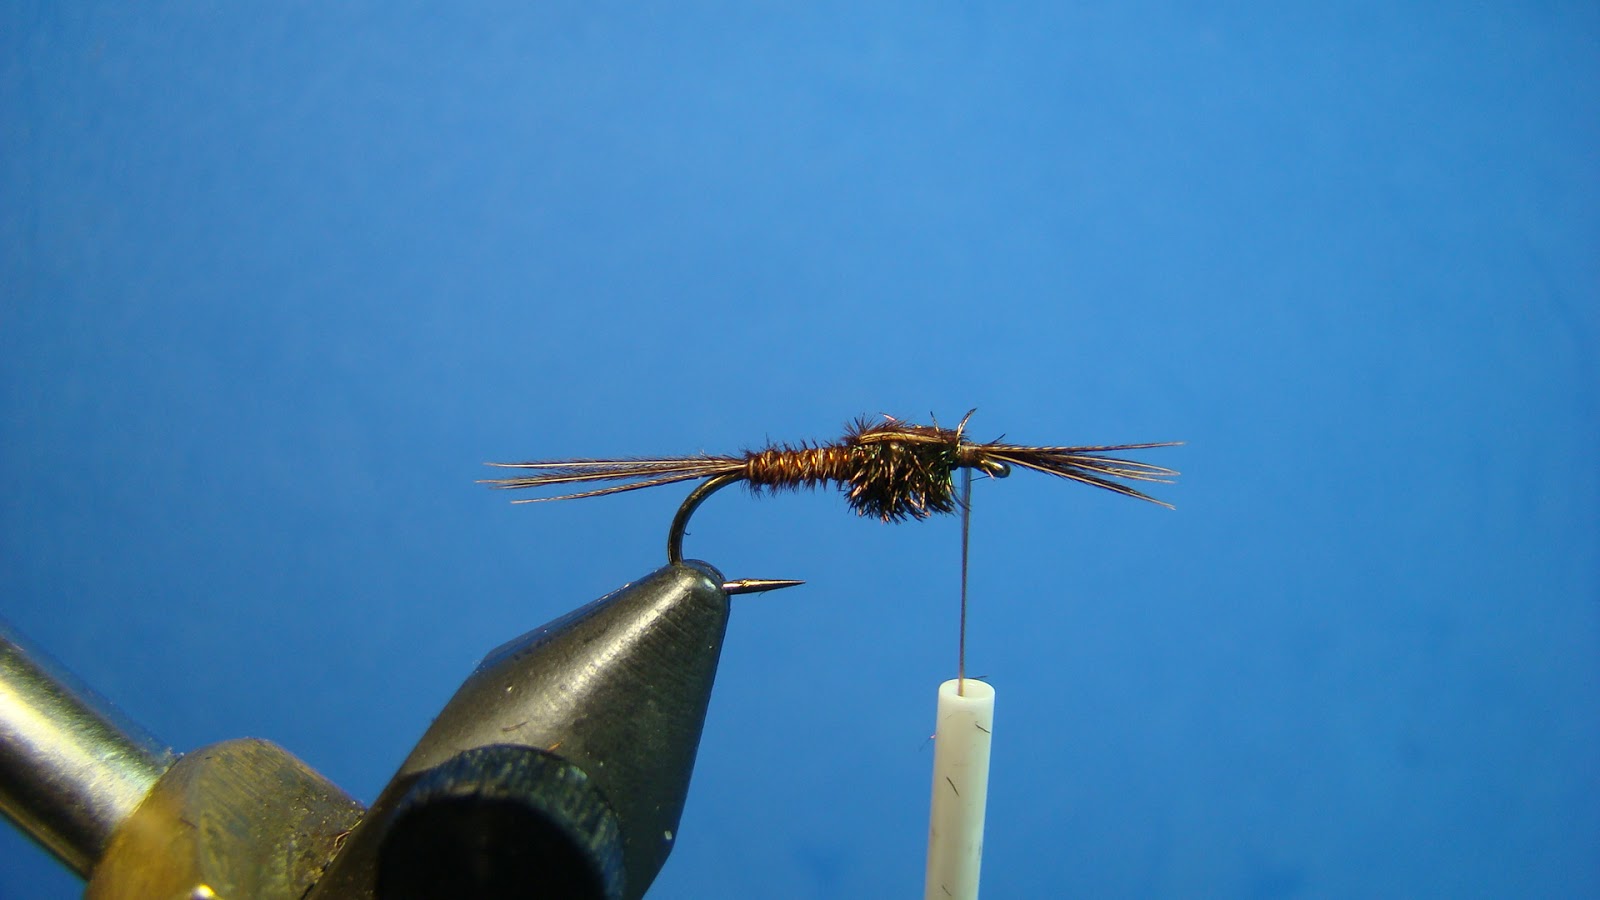
Separate the legs evenly and tie in along the sides. Whip finish and you are ready to wet a line!

Enjoy!
No comments:
Post a Comment