

Materials
Tube: Choice (I am using Pro Tubefly System's Large 40/40mm)
Thread: 6/0
Shoulder: Weighted nickle plated saucer (www.speyco.net) Drops weights are available from Pro Tubefly Systems. Additional shoulder material is underfur from arctic fox. Color should be same as first color of marabou. However, some interesting color combinations have been devised with different shoulder colors.
Collar: One or more color(s) of marabou wrapped by tip. Additional facing collars of guinea and/or hackle may be added. Various colors of grizzly saddle hackles, ostrich, or small rubber leg material may be tied over the body for a different action and look. The sky is the limit!
Step 1:
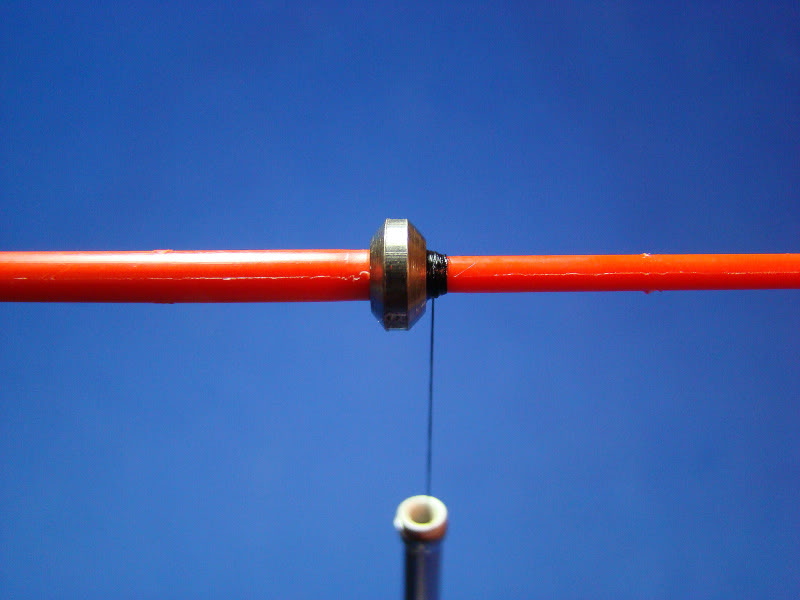
Firmly insert tube on needle then add saucer or drop weight. If these are unavailable, a shoulder of dubbing or chenille should be built up into a ball.

Lock saucer or drop weight in place with a wraps of threads. Place a drop or two of this head cement over wraps.
Step 2:
Cut a small "bunch" of arctic fox from the tail. Remove all guard hairs and slightly thin out underfur with comb. Place underfur over the upper half of the tube and make a couple wraps of threads. Ensure underfur is spread 180-degrees on the top of the tube. Make couple of firm wraps to secure underfur in place. You can also dampen the fur with wet finger tips to manage hair.

Turn the tube tube over and repeat.

Cut away the butt section of the underfur. Add a drop or two of thin head cement. Comb hair out ensuring 360-degree coverage.

You should have this appearance. The shoulder area keeps the marabou from collapsing around the tube and provides a large silhouette.

Step 3:
Tie the first color of marabou in by the tip and lock in place by bringing the tip back over the shoulder.

Slightly dampen marabou with finger tips. This will manage the fibers while wrapping.. Make three to five wraps around the tube and secure.

Step 4:
Tie in 3 to 5 strands of favorite flash material and lock in place. Mirage Flashabou is pictured.

Step 5:
Repeat step four with facing color of marabou. Once marabou is secured, tie in and lock a few more strand of flash material. Apply a drop or two of thin head cement.
Now would be a good time to mention bulk. I would recommend no more than a total of eight wraps of marabou regardless of the number of colors used (some will advocate even less). This will ensure the fibers breath and do not mat together when wet. If the marabou fibers are a little fuller when dry (before tying), lessen the amount of turns.

Step 6:
Place a cone or bead over the tube and firmly push in position.

Step 7:
Remove tube from the needle. Cut excess front tubing with a razor blade. Leave approximately 1/16" (3mm) to the cone or bead. With a lighter's blue portion of the flame, melt (roll) back the tube. This will lock the cone or bead to the tube. Depending on the length of the marabou you may also cut away a portion of the aft tube section.

Instead of buying expensive fly boxes specifically designed for tube flies that only hold a few flies, I find the larger slotted foam boxes more than adequate to store a large quantity. Simply add a hook to a tube and insert. These large boxes fit perfectly in to a back pack.
Color combinations are endless! Have fun, get creative, and hit the water!


The pink and red marabou tube tied step by step for the blog.

Enjoy!
No comments:
Post a Comment