The story goes... Noted professional fly tier C. Jim Pray of Eureka, California gave his friend Walter J. Thoresen a few flies try on the Eel River. The flies were all tied on #6 hooks in the proven Royal Coachman colors. On the day after Christmas in 1936, Thoresen quickly managed his 5-fish limit with a combined weight of 60-pounds. The largest fish was entered in to the annual Field and Stream fishing contest and the 18-pound beauty won the contest. Having accomplished this mighty feat, Pray decided to honor and name the fly after his friend.
The Thor is an excellent steelhead patterns that will forever last the test of time. Why? Perhaps it is the highly effective Royal Coachman colors or it's simplicity in tying. However, leave no doubt, it is still effective today as it was decades ago. I am positive the Thor will continue to be a killer pattern as long as steelhead return to the river.
The Thor is an excellent steelhead patterns that will forever last the test of time. Why? Perhaps it is the highly effective Royal Coachman colors or it's simplicity in tying. However, leave no doubt, it is still effective today as it was decades ago. I am positive the Thor will continue to be a killer pattern as long as steelhead return to the river.
The original Thor was tied using red chenille for the body and a wing of white bucktail. Although a few commercial tiers continue this traditional recipe to save time at the the bench, more often than not, the wing is substituted with calf tail. Amateur tiers prefer substituting the body with angora goat, seal, wool, floss, or synthetic material. A wing of polar bear, goat, temple dog, arctic fox, calf tail or skunk are perfect substitutions with the latter three the most common for winging material.
Materials:
Thread: Black or red
Hook: Choice (Alec Jackson Daiichi 2051, size 5 pictured)
Tail: Orange hackle fibers
Body: Uni-yarn, Chinese Red wool (pictured)
Hackle: Dark brown or coachman brown
Wing: Skunk (pictured)
Please review the Beginner's Guide before proceeding.
Step 1:
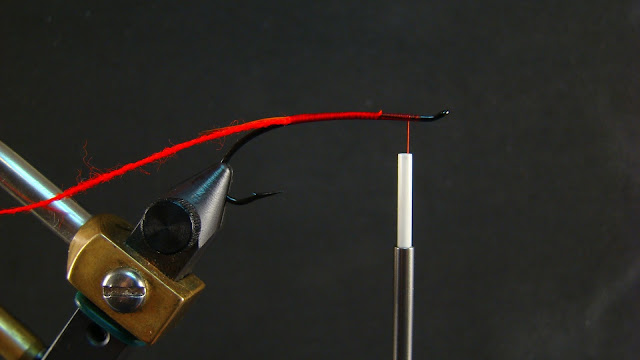
Place hook in vise and start thread one eye length behind the eye advancing thread to a position just forward of the hook point as pictured.
Align 12 to 15 orange hackle fibers from the stem and remove with a quick downward plucking motion. Secure hackle fibers to the top of the hook shank with flat rearward wraps of thread to the hook point. Cut butt ends of hackle parallel to the shank and then return thread to the area immediately behind the returning loop wire as pictured. Tail length is approximately the hook gap.
Step 3:
Remove approximately 7-inches of wool yarn for the spool. (Some tiers prefer to the wrap the yarn from a bobbin.) Tie in wool to the side of the hook shank immediately behind the end of the returning wire. Make tight flat. even wraps of thread to the area in front of the hook point and return to the returning loop. This will keep the body thickness even throughout- especially over the returning loop wire. Additionally, remember to take in account the thickness of the material in use. The rear end of the first wrap should be even with the point on this style of hook.
Step 4:
Twist yarn counter-clockwise until the two strands appear side by side (flat). Make flat, even wraps forward until your reach a spot just aft of the starting point (initial thread wraps) and secure.
Step 5:
Tie in a dark brown hen feather by the tip. I like the fibers to extend to approximately the end of the body on this style of hook/
Step 5A:
Take three or four wraps and secure.
Step 6:
Prepare wing and tie in wing as describe in the Beginner's Guide. This time I am leaving the hackle in place vice moving the hackle to the "down and back" position. Complete fly with a three or for turn whip finish, cut thread and apply an additional coat or two of head cement.


No comments:
Post a Comment