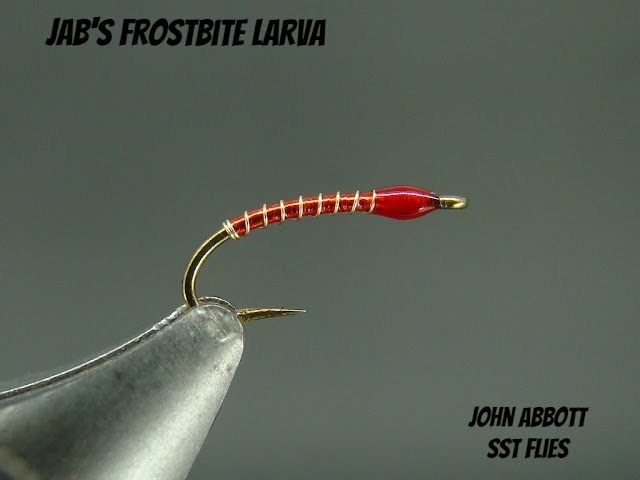
The "Frostbite" turns 30-years old this February and was first used on Putah Creek where it gained a small following. When I transferred to the Pacific Northwest this little beauty continued to work well for me on the lowland lakes of the Puget Sound region as well as the meanadering Rocky Ford.
The idea came to me one evening while tying steelhead flies. I don't remember the pattern, but it involved laying a floss tag over french silver tinsel. This technique is fairly standard for me on soft hackle flies as well.
What makes this pattern so special? Well... I'll begin with the camera doesn't quite pick up the unique attribute of this larva imitation, but it rests with the two material body construction. Second, it can be fished in both lakes and rivers with good populations of midges available to the fish. More so in waters with good numbers of both aquatic worms and midges which provide the pattern double duty.
The Secret and Helpful Tying Hints
1) Here's the secret this pattern. The body is first layered with silver Flashabou and then over wrapped with Frostbite (a flat translucent synthethic material) or Body Quill. This combination gives an extremely translucent glow (undescribable yet beautiful). Although Frostbite is still available it can be tough to find. And it can be a pain to unravel from the spool as it is loosely woven and knots quickly when preparing it to a workable material. Thankfully, Quill Body, a near exact facsimile and very easy to work with, is readily available and comes in several colors.
2) Various colors of Flashabou can be used for the underbody, but nothing comes close to silver for effectiveness. I'll put gold Flashabou at a close second. I'll be experimenting with various Perdigon and UV tinsels come this late winter.
3) Try this on your soft hackles. Sometimes I cover the entire body with Body Quill, but I usually end up leaving a little tag of Flashabou visible. A lot of color options for you to try!
4) Remove the two microfilaments from the Body Quill before tying in and wrapping. This makes for a smooth flat body.
5) Various degrees of color can be achieved by addtional wraps of Body Quill. Experiment a little..
6) To begin start your thread just behind the eye and leave a small gap. Tie in the ribbing and Flashabou together on the far side of the shank. Secure with just a few wraps and remove waste ends. Wrap Flashabou over the ribbing and proceed down the hook shank until you reach a point just aft of the barb area (pictured). Ensure ribbing runs even and parallel with the shank, Return to the thorax area securing the Flashabou with flat wraps. Tie in a single strand of Body Quill or Frostbite and wrap down the hook shank covering the Flashabou. Return to the thorax area and secure with a few wraps. The number of turns for the ribbing is a personal choice. I like to start with one or two turn immediately behind the body and strive for a minimum of 7 over the body. Once every thing is secured form a neat head and apply your favorite UV resin (5-minute epoxy was used originally).
Materials
Hook: TMC 200 or Daiichi 1270, 1260, sizes 16 to 22 (Size 20 pictured)
Thread: 14/0 Veevus, color to match body. However a mismatch body/head color often works well. Here's an example: Red Head Midge
Ribbing: Gold wire, fine. (Pictured is Sybai's 0.10)
Underbody: Silver Flashabou
Overbody: Body Quill, red
Head: Thread with two coats of thin UV resin
Here's an example of this technique on a steelhead pattern. Red Frostbite was applied over silver french tinsel.


No comments:
Post a Comment